Five easy citrus trees to grow in a container on a patio, deck, or (almost) anywhere!

Citrus trees aren’t just for tropical climates! Tree-fresh citrus fruit is an amazing delicacy and one that most people don’t get to enjoy. You can change that for yourself by growing any of these citrus trees in a container. Container citrus trees need a bark or compost-based soil that isn’t too dense, at least 8 hours of sunlight per day, daily watering, a well-drained pot, and a sunny place out of freezing weather. Some the easiest citrus tree varieties we’ve found are listed below:


  • Meyer lemon – Botanists say this isn’t really a lemon – it’s a hybrid of a lemon and a mandarin orange. Whatever it is, it’s easy to grow and the fruit is amazing. It’s sweeter than a “true” lemon, thanks to the mandarin genetics. The fruit is normally ripe in winter, and the tree grows to only 6-10 feet tall, making a perfect container tree. The fruit looks and tastes like a lemon and makes excellent lemonade, regardless of what the botanists say.
IMG_5451
Ripe Meyer lemons on a container tree
  • Dwarf Key lime – This is a miniature tree version of the tree that makes the amazing limes, prized for pies and tacos. The fruit ripens in late fall or early winter. The tree grows to about 6 feet if you don’t prune it to keep it shorter. The tree is forgiving and it smells amazing. And dwarf refers to the tree, not the fruit – the fruit is full size and juicy!
IMG_5507
Key lime on a container tree


  • Makrut lime – This lime has wrinkly skin and it’s round, not oblong. The leaves of the tree are frequently used in Thai and other Asian cuisine. The fruit ripens in late fall. The entire fruit can be candied and eaten. The juice of the makrut lime can be used as a natural cleaner. Makrut is often called Kieffer in the U.S. It’s a lime, so the juice can be used for cooking in any recipe that calls for lime juice.


IMG_2040
Young Makrut limes on a container tree.
  • Meiwa kumquat – Kumquats are an underappreciated little fruit. The Meiwa kumquat is a small tree that produces a small citrus fruit that can be eaten whole or made into a fantastic marmalade. The tree is naturally frost-resistant and very forgiving to grow. It never complains and produces a consistent crop of sweet little fruit.
kumquat-2852236
Kumquats
  • Hamlin orange – Hamlin is a sweet orange that is more cold tolerant than other oranges. It’s easy to grow and the fruit is sweet. The fruit can be eaten fresh, or squeezed for juice. This is an old variety – it’s been grown successfully in tropical regions and in containers in non-tropical regions since the 1880’s. Hamlin orange isn’t a navel orange and it’s pretty large, making it well worth the effort to grow in a container.
IMG_5445
Just about ripe!

That’s it! Choose one of those 5 and provide a little care, you should be able to eat your own tree-fresh citrus fruit, even if you live in an apartment or tiny house 🙂

For more detailed information on growing citrus trees in containers, check out the upcoming book The Lazy Gardener’s Guide to Growing Citrus in Containers, available summer 2019.

Texan82 _COVER(1)

The Easy Elderberry

berries-949061_1920(1)


Elderberries (Sambucus  sp.)  are native to the subtropical and temperate regions of the world. They are primarily found in the Northern Hemisphere, though there are elderberry species in parts of Australia and South America. There are about thirty species of small trees, herbaceous perennial plants, and shrubs in the Sambucus genus. Elderberry plants are cultivated for their fruits, flowers, and ornamental leaves.. Elderberries produce big clusters of small cream-colored or white flowers during late spring. These flowers turn into small red, blue-black, or black berries. Wild genetic sports of elderberry exist, producing white or yellow berries.

The elderberries are loved by birds and other wildlife. The elderberries are usually made into preserves, jams, pies, or jellies for human consumption. The stems of the elderberry plant have a soft pithy center that is easily removed; for this reason, elderberry was traditionally used for spigots for harvesting maple sap for syrup making.

How To Plant Elderberries

Elderberries begin produce berries when they are two or three years old. The native American varieties consistently produce a large crop of berries. Elderberry plants thrive in a wide variety of soil conditions. They tolerate a wide range of soil pH levels and they are even tolerant of wet and low nutrient soils. They should be watered during any extended dry spell.

Plant elderberry in winter in the southern United States and similar climates; in areas where the soil freezes, plant elderberry in the spring as soon as the soil can be easily worked.  Use raised beds when planting in clay soils for heavier yields. Plant elderberry plants 3 feet apart in rows 10 feet apart.

The first year’s growth on elderberry plants may be slow as the plants acclimate to the transplant; subsequent years will produce extensive growth. For better yields, plant at least two elderberry plants for cross pollination. Elderberries grow best in full or partial sun.

Care Of Elderberry Plants

After the first year, once elderberry plants are established, they need very little care. For higher yields, the plants can be mulched and fertilized. Fertilize the plants with a balanced fertilizer twice a year. Water the elderberry plants consistently during dry spells; this will allow the plants to make larger and juicier berries.

Elderberry plants do benefit from pruning in early spring. Prune off dead and diseased branches only.

Propagation Of Elderberry

Eldberry is easily propagaged by cuttings placed in either water or a peat moss propagating mix. Take softwood (usually green colored) cuttings from the end of elderberry stems in early spring. Remove the leaves on the lower 2/3 of the cuttings and place the cuttings in either a jar of water in a sunny window sill. Change the water in the jar a few times a week to prevent it from becoming rancid. Roots will start forming within 8 weeks in the water.

Alternatively, place cuttings in a container with a 50/50 mix of peat moss and perlite.  Cover the cuttings with a plasitic bag and set the container in a bright area out of direct sunlight. Use a spray bottle to mist the cuttings daily. Roots will for on the cuttings in about 6 weeks.

Transplant the cuttings either into containers in sheltered place outside, or directly to the final planting site.

Container Growing

Elderberries can grow into thick bushes on the ground and even spread over a wide area with time. Despite this, they can also be grown in large containers if needed. Since the roots will be confined to the container, the tree will need to be pruned each winter to keep it small. To prune a containerized elderberry plant, cut off any stem that touches the ground, or that is damaged. The stems that cross others should also be removed.

Harvesting The Elderberries

Elderberries are usually ready for harvest between August and September. The ripe berries will usually turn deep purple or red. Cut off the entire berry cluster at harvest and remove the berries from the stem. Once harvested, elderberries should be processed right away or stored in the refrigerator, since they spoil quickly at room temperature. They can be cooked and used to make wine, pies, jams, preserves, and syrup.

Enjoying The Harvest

The leaves, bark, and roots of the elderberry plant have a variety of traditional medicinal usages, including as treatment for colds, flu, stomach issues, and pain relief. Elderberries are rich in vitamin c, phosphorus, and potassium. The extracts from its leaves can be used as an insecticide and to treat fungal diseases on plants.

The consumption of raw elderberries isn’t recommended, since the berries, bark, leaves, and roots contain a cyanide compound. This compound is made non-toxic buy cooking and otherwise processing the raw berries.

To freeze elderberries for later use, remove the berries from the stem and wash them. Scald the berries in boiling water for one minute, and then cool them in size water. Drain off water pat the berries dry. Pack the berries in freezer bags and freeze. They should keep for about a year.

Using fresh or frozen elderberries, try this recipe for elderberry jelly:


3 pounds elderberries juice of 1 lemon 1 box fruit pectin 4 1/2 cups sugar

Heat the berries over low heat until the juice starts to flow and then simmer the fruit for 15 minutes. Strain the liquid through a double layer of cheesecloth (overnight is fine). Mix the elderberry and lemon juices along with just enough water to make three cups of fluid. Add the pectin, bring the mixture to a boil and stir in the sugar. Can in jars per manufacture’s recommendation.


elder-1595360


Five Things I Learned about Growing Fruit Trees in the Hood River Valley

Five Things I Learned about Growing Fruit Trees in the Hood River Valley

IMG_0728

Bird and mammal predation is a problem everywhere. Across the hundreds of acres of orchard land around Mt. Hood, in my discussions with orchard employees and owners, one topic came up multiple times: birds are a problem. Birds enjoy fruit, especially when it’s ripe or nearly ripe. The same problem plagues many of our customers. One of the most common questions we receive is how to protect fruit trees from birds. We often recommend bird netting, the most commonly available “solution” for bird problems, though it’s not a perfect or easy fix.

IMG_0694

The commercial orchards I visited used two different methods to control birds. One of those methods is reflective metallic tape. This tape was placed on a branch of every tree to blow in the wind like the video on Facebook.

The other method involved “frightening devices.” These were described as devices that made a “gun shot sound” anytime a bird landed on a tree. These devices are clearly more expensive than the reflective tape and they are apparently not a perfect solution, since the birds could learn (believe it or not) to not be afraid of the sound.

At the end of the day, these orchards do lose fruit to birds. For the home orchard owner, the one takeaway from my conversations with orchard owners and employees was that the reflective tape works better than the “gun shot devices.” But no solution to this problem is perfect and you can count on losing some fruit.

IMG_0722

All modern fruit trees need to be sprayed with something.

The orchards I visited were almost all of the conventional type, with rows of the same type of fruit trees across hundreds of acres. In monoculture settings like that, conventional spraying is by far the most common method of insect and disease control (We did visit one orchard that only used organic sprays, but since they were surrounded by conventional orchards, they could not be certified as organic).

My takeaway from talking to orchard owners and employees about spraying was this: modern fruit tree varieties will most likely need to be sprayed with something at some point in their growth cycle. Regular spraying of trees helps prevent disease and allows the trees to produce the perfect fruit that customers like to buy at the supermarket.

But for the home gardener, small scale grower, or commercial orchard that isn’t surrounded by conventionally sprayed orchards, organic sprays are definitely an option.  We’ve been experimenting with organic sprays for fruit trees in our orchard and for the fruit trees we grow and sell. This spray has impressed us:

IMG_0973

Fruit trees can grow and produce for decades given the right conditions.

I was amazed at the old pear and apple trees that were still producing in the Hood River Valley. The trees were not changed on a regular basis – apple and pear trees were replaced with they died. In contrast, here in East Texas, we usually replace peach trees on a 12-15 year cycle, since peach production drops after that. Apples and pears, however, will produce for decades, including in the South. Decades-old trees were in many of the orchards we saw in Oregon.

IMG_0691

Irrigation is important everywhere, even in the “perfect climate.”  I was amazed at the how perfect the climate was in the Hood River Valley for conventional fruit production (of common varieties), in terms of rainfall and chill hours (though I will say that we have a better climate for peaches and the natives we sell). But…even there, orchards are irrigated. Most are irrigated with drip irrigation tubes stretched along the ground, but a few of the orchards were irrigated with overhead sprinklers. The only advantage of the sprinklers would be irrigating during late freezes to protect young fruit and flowers from freezing. Otherwise, drip irrigation is a far better method of fruit tree irrigation, since it wastes less water and prevents contact with water that may splash up fungal disease spores from the ground.

Full commercial production on a large scale requires an infrastructure. Besides the orchards, what impressed me about the Hood River Valley were the support businesses that had developed around the orchard business.  These are crates that were stacked in various places among the orchards; they are filled with fruit at harvest (hand harvesting seems to still be the norm in this area) and taking to packing and sorting businesses (a few of these may have been co-ops or something owned by the growers):

IMG_0715


A few of these packing businesses are on railroad tracks, where the produce can be taken to right after it’s picked and sorted. I didn’t really get into the process of what happens to the fruit once it leaves these businesses. It made me realize how great farmer’s markets are – you can grow just about any quantity of produce and have a market of local customers who want to buy your product.

IMG_0695


In summary:

Birds are a problem in orchards; use metallic (mylar) tape or “bird frightening devices” (probably not a good choice in town);

Fruit trees will need to be sprayed at some point; more so if the fruit is to look “perfect” for the supermarket or other customer;

Fruit trees are an investment and may very well produce for decades;

Fruit tissue includes a lot of water, so plan on watering trees, especially when it’s dry and fruit is on the branches;

In many places, the best place to sell produce will be a farmer’s market instead of the supermarket, especially on a large scale.

Soil Solarization

Soil Solarization

Soil solarization is an efficient and practical way of easily controlling soil-borne pathogens and weed seeds. Soil solarization involves putting transparent plastic on the soil surface during a hot time of year for four to six weeks. The solar energy from the sun heats up the soil to a depth of around 12” during this process. Harmful plant pathogens, including bacteria, fungi, and nematodes, are killed during this solarization. Many weed seeds are also harmed during this process, greatly reducing the germination of weeds in the solarized area. Beneficial soil microorganisms readily recolonize an area that has been solarized. Harmful microorganisms, on the other hand, take much longer to return to the solarized soil.
To solarize soil, remove any mulch from the surface and till the soil to a depth of at least 12”. Water the tilled soil well and shape the rows if gardening in that style. Dig a trench about 4” deep around the area to be solarized.
The clear plastic sheeting that is available at hardware stores or almost any big box store works well for soil solarization (two-millimeter plastic is best, but any clear plastic works). On a clear, hot day, place the plastic sheeting over the tilled soil. Place the edges of the plastic in the trench and fill dirt in over the plastic in the trench to hold it down. The bare soil beneath the clear plastic should be visible, and ideally the plastic will be touching the soil.
Leave the plastic on the soil for four to six weeks if solarizing soil during the heat of summer in warmer areas. In cooler climates, or if soil solarization is done in the spring, fall, or winter, leave the plastic in place for about eight weeks. Research shows that these are the optimal times to solarize soil and effectively kill soil pathogens and weed seeds.
Once it’s time to remove the plastic, carefully dig up the edges of the plastic and remove it from the top of the soil. The solarized soil should be only minimally disturbed. When it’s time for seeds or plants to be planted into it, dig only deep enough for planting. Do not till, as this will bring potential plant pathogens and weed seeds from deeper in the soil to the surface, negating the effects of solarization. Otherwise, the soil can be treated as regular garden soil, and plants growing in it can be fertilized, watered, and cared for as needed.
Raised beds and soil for containers can also be solarized using a similar method. The soil for raised beds or containers can be spread out on the ground to a 6–8” thickness and covered in clear plastic as described above. After about four to six weeks, the soil can be removed and placed back into the container or the raised bed.
Soil solarization takes some work up front, but it pays off by almost eliminating soil disease issues and greatly reducing the amount of time and effort needed to weed a garden.


SOIL_SOLARIZATIONsolarization

5 Tips for Growing Blueberry Plants

Blueberries are a fun and relatively easy plant crop for home gardeners. Here are 5 tips and tricks to help you grow them successfully.

IMG_5686

Watch your soil

Soil is perhaps the most important of all the factors that make or break a blueberry planting. Blueberries can only grow within a very specific pH range. pH is a measurement that describes whether a substance is  acidic or basic. Soil pH plays a factor in all plant growth, but it is particularly important when it comes to growing blueberries. Blueberry plants grow best in very acidic soil, with a pH range from 4 to 5. Many of the native soils in the southeastern United States from East Texas to the Carolinas, are naturally acidic. Many of these soils do not need any amendments to make them more acidic, though in the cases of pastures that have been limed, some amendments may need to be needed.

In parts of the west and north outside of the native range of conifer forests, including the blackland soils of Texas, the native soil pH is usually too high for blueberries. Blueberries will not simply fail of thrive in more neutral or even basic soils – the plants will die completely.
The best way to know what your soil pH level is to take a soil sample and send it to a university soil lab. There are also home test kits available online and in some stores. If your soil is not acidic enough for blueberries, either grow the blueberries in raised beds (or containers) with acidic soil is added, or amend your native soils to bring the pH to the proper level.

Several different companies sell garden soil that is appropriate for blueberries in raised beds or containers. To amend your native soil, add sulfur or aluminum sulfur the season prior to planting. Till this in the top 6 inches of the soil and test the soil again. Apply those amendment at the rates recommended on the packaging.

Water those plants

Blueberries are very shallow-rooted. Unlike fruit trees and many other plants, blueberry roots grow near the soil surface and rarely go much deeper than 6 to 8 inches, even on mature plants. For this reason, they are especially susceptible to drought stress. Blueberries will need at least an inch of water each week during the heat of the summer. During that time of year, it is very hard to over water blueberries in well-drained soils. Plan on giving your blueberries water at least twice a week, and maybe even more and  more frequently on new plants. While there are occasional summers when we get adequate rainfall, I always plan on watering the blueberry plants during the summer because of their sensitivity to dry soil. If the new growth on blueberry plants is wilting when the plants are not in direct sunlight (such as the morning or evening), then the plants need water.

The source of water for blueberry plants is also important. I learned this the hard way a couple of years ago when I used our community water to water several dozen blueberry plants I had planted for our own use. I watered the plants deeply twice a week during a dry spell in the middle of summer. Even though I was watering them, all but a handful of those blueberry plants died. At first I thought it had something to do with the plants – which we had grown on another location. But no one else was having issues with those plants. Then one day I turned on the water and I smelled chlorine coming from some of the hoses. That’s when I remembered what an old timer told me several years ago – our community water where we live has a high pH due to the chlorine that’s added to it. That high pH, he said, will eventually kill blueberry plants. I replanted the planting the next season, and the plants have only been watered with either rainwater, or water we bring in from the creek.  And they’re all doing well!

So watch the water you use to water your blueberry plants. Rainwater, natural pond/creek water, or well water may be a better option to keep the soil around the plants at the proper pH level.

Pruning isn’t hard
Thankfully blueberries don’t require regular pruning. They only need to be pruned if  they show signs of disease on a specific branch.

But this made the list because there’s one trick that a commercial grower showed me that I thought I would share with you. Most people (myself included) get excited about the berries on their little blueberry plants. This commercial grower told me that they prune off the berries and even the blooms on their small plants.  He said if you do this for 2-3 years, that the plants will put all of their energy into growing leaves and stems. in the 3rd or 4th year, the harvest of blueberries will be much greater than the harvest that would have been collected from the smaller plants.

Fertilize those babies!
Blueberry plants are very sensitive to fertilizer when first planted. It’s best to wait at least 30 days after planting to apply any type of fertilizer do you were young blueberry plant. If the blueberry plants are planted in the winter, wait until spring to fertilize. Fertilize blueberry plants each spring with 16-8-8 fertilizer or something similar. Blueberries planted in soil that is rich in organic matter should not need any fertilizer beyond the spring application.

Mulch mulch mulch

Because the roots of blueberry plants are in the top several inches of soil, blueberry plants benefit from a layer of organic material applied as a mulch.  Mulch should be applied to blueberry plants at planting. Due to their sensitivity to soil pH, acidic mulches really benefit blueberries. One of my favorite mulches for blueberries is pine straw. It’s free and easily available from our property. Another good one is pine bark mulch. Both pine bark mulch and pine straw have a lower pH, which helps maintain the proper soil pH in the blueberry root zone.

In college and graduate school, I worked as a yard man for an older couple. One thing the older man would have me do is apply cottonseed hull to the base of all of their azaleas and the couple of blueberry plants that they had. Cottonseed hull is also in acidic mulch that can be used. I’m not sure how readily available it is, but in some rural areas it might be available at feed stores.

You could also make your own blend of compost, manure, and other acidic mulch material. This works as both a mulch and a slow-release fertilizer.

Blueberries are a fun and relatively easy crop to grow 🙂

IMG_0083

Chapter excerpt from The Lazy Gardener’s Guide to Easy Edibles: Daylilies

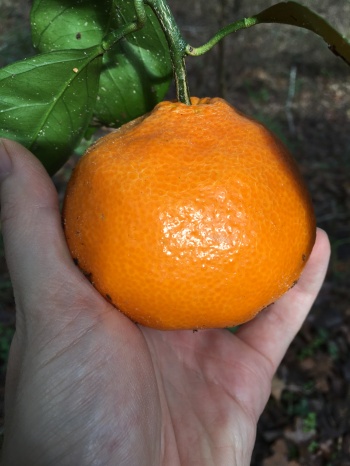
Here’s an excerpt from the chapter on growing and eating daylilies in The Lazy Gardener’s Guide to Easy Edibles:


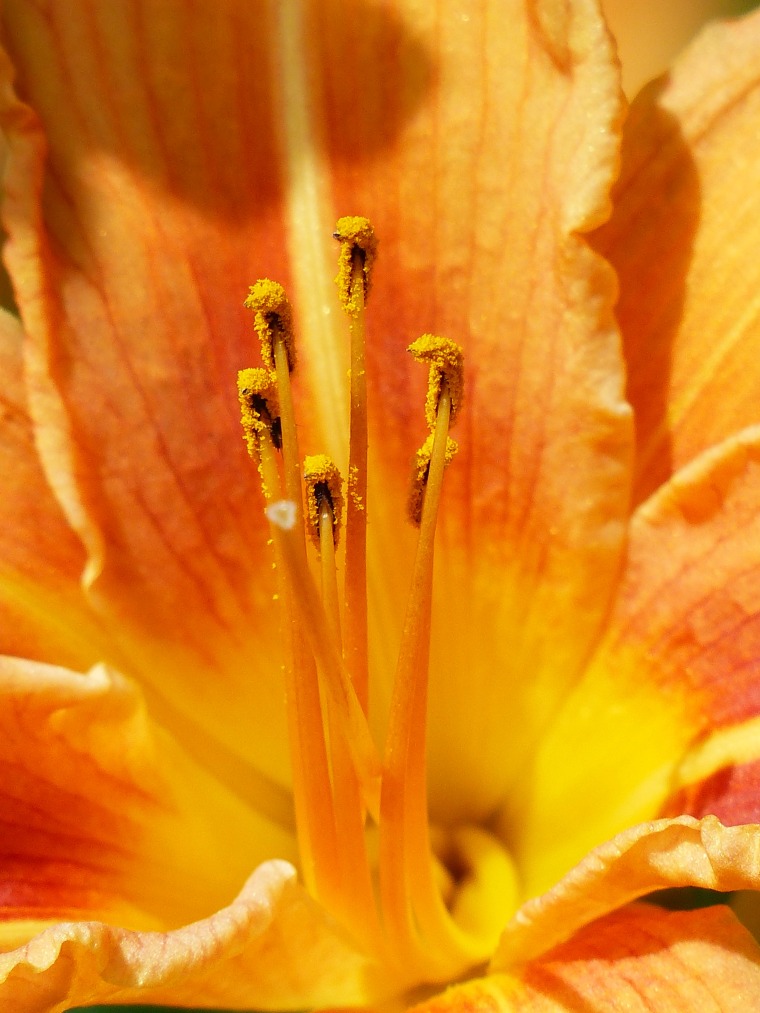
Daylilies were introduced to American gardens in the late 1700s from Europe, where they had been brought from Asia in the Middle Ages. They are easily hybridized by transferring pollen from one flower to the stamen of another flower, and then growing out the resulting seeds. Thousands of varieties have been developed by this method.

True lilies—any plant from the genus Lilium—are toxic if consumed. Do not eat true lilies! Daylilies are not true lilies, but when eaten, they can cause allergic reactions in some people. If a person knows he or she is allergic to daylily pollen, they should avoid eating any part of the daylily plant.

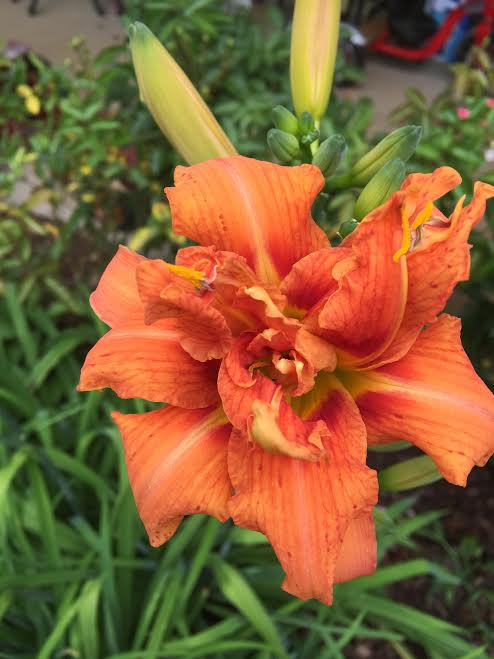
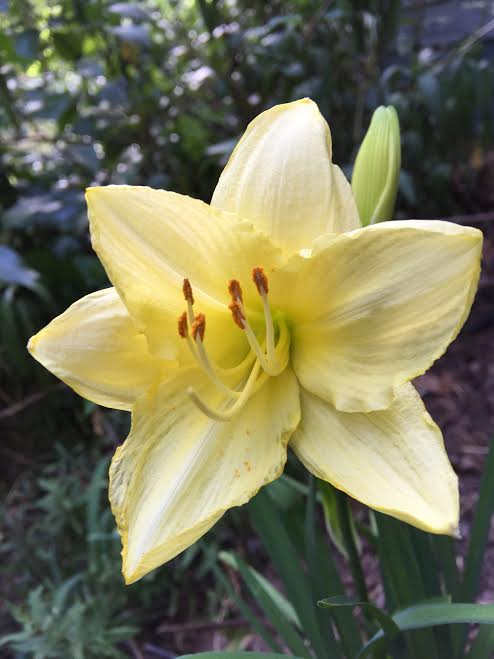
One other word of warning about eating daylilies: all modern daylily cultivars are bred for the beauty of their flowers, not their edibility. For this reason, care should be taken when consuming newer cultivars. The older, naturalized species of daylily, such as Hemerocallis fulva (including the double orange blossom variety “Kwanzo”) and Hemerocallis lilioasphodelus L., the naturalized yellow daylily, are both tried and tested edible species. Most other varieties are probably edible—just be sure to eat a small portion of these other varieties at first to ensure that they don’t cause any adverse reaction. Some people experience an upset stomach after consuming large quantities of daylilies.

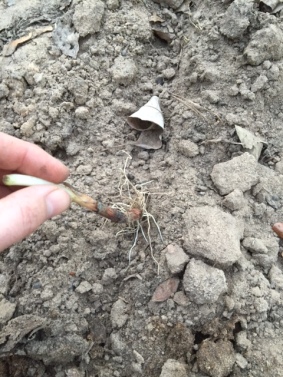
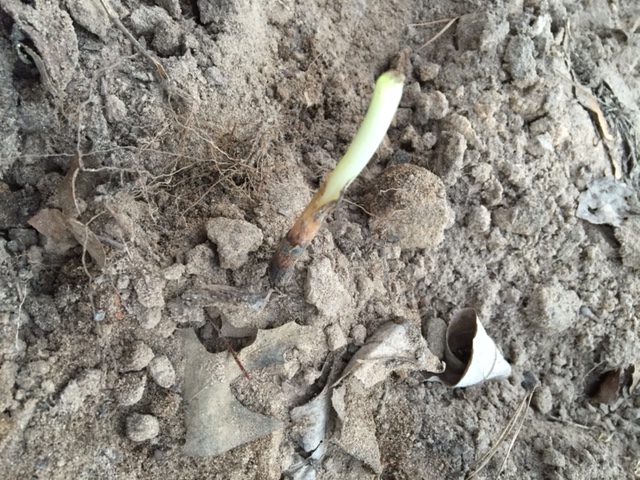
The daylily flowers, buds, and roots are all edible. Young shoots in spring are also edible and can be eaten raw or cooked in a skillet in butter. The flowers can be harvested, dried, and added to soups as a thickener. The flowers have a unique flavor and contain some protein and vitamins. They can be fried in batter using the tempura style of cooking.

'Kwanzo' the double orange daylily.

How to Plant

Daylilies should be planted in a full-sun location with well-drained soil. The bulbous roots should be planted in loosened soil with the green leaves above ground. Water the new daylilies thoroughly after planting. Daylilies grow best with a least eight hours of direct sunlight each day.

Care

In much of North America, daylilies are delightfully easy to grow, as long as they receive adequate moisture and sunlight. Daylilies only need fertilizer sparingly, since over-fertilization will reduce blooming and may even kill the plant. Daylilies can benefit from an application of compost two to three times a year. If conventional fertilizer is used, apply a balanced fertilizer, such as 12-12-12, around the plants twice a year. Gardeners who grow daylilies for breeding or for show follow very specific fertilizer guidelines to ensure the plants produce the largest blooms.

A yellow hybrid daylily.

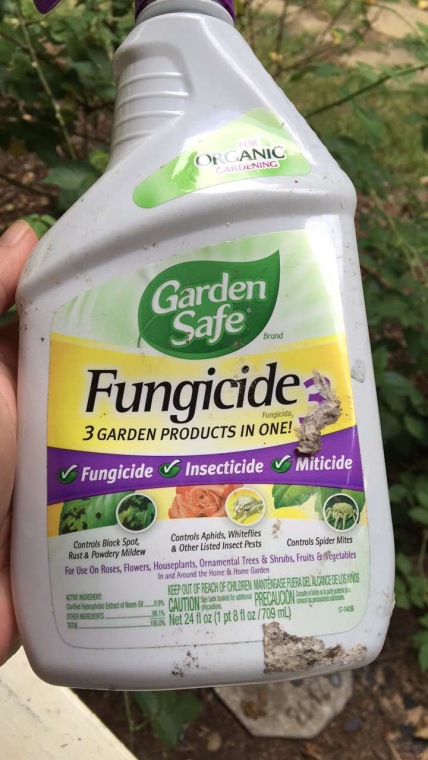
Daylilies have a few pests, including aphids, spider mites, and thrips. When these pests are present in large numbers, they can be controlled using a homemade or store-bought insecticidal soap.

Very few diseases impact daylilies, and only one disease can kill them. Crown rot, a fungal disease caused by excessive moisture during the hot summer months, can kill daylily plants. If this disease and the conditions that bring it to daylilies persists in an area, it may be best to allow the planting site to remain free of daylilies for several years to help reduce the occurrence of this disease.

Once established, daylilies need to be watered only during dry spells. They benefit from a layer of mulch year-round.

Propagation

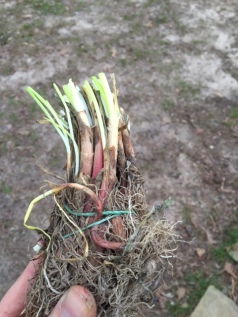
Daylilies are most commonly propagated by division, which involves dividing the clumps of daylily plants into smaller groups of plants. This is usually done in early spring before new growth has started. To divide daylilies, carefully dig up the existing group of plants, making sure to leave as much root mass intact as possible. Using a small spade or knife, divide the clump into individual plants or groups of two or three plants. These smaller groups of plants can be planted anywhere that is suitable for daylily cultivation.

Daylilies can also be propagated by seed. In some cases, bees and other insects will naturally pollinate daylily flowers, and seed pods will develop. Gardeners can also pollinate daylilies by moving pollen from one flower to the stamen of another. The resulting seeds will be a hybrid of the two parent daylilies.

Daylily seeds can be planted as soon as the seed pod is dry and open. They can be planted in pots or directly sown in the garden.

Main chapter pic

Container Growing

Daylilies are an easy plant to grow in containers. The daylily requires plenty of sun, and the plant may have to be divided frequently to keep it from outgrowing its container. Indoor container growing may not be practical because of the intense light requirements of the plant. Outdoor container growing is possible as long as the daylily plant is periodically divided or provided with a larger container as it grows.

Harvesting

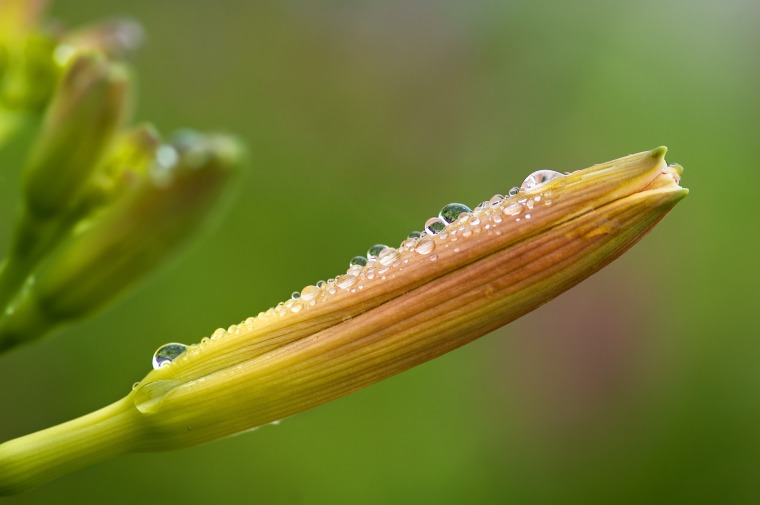
For eating immature flowers, harvest the daylily flower buds right before they bloom. The entire flower can be harvested at peak bloom—usually the middle of the day—and added to soups. The young leaf shoots are best when harvested in the spring.

The roots (or tubers) can be harvested any time, though they are normally at their peak freshness from winter through early spring. Remove no more than 25 percent of the plant roots during this process to prevent injury to the plant. Select and remove the bulbous part of the roots. The small, fine roots are not edible.

Daylily flower bud.

Enjoying the Harvest

Besides its beauty, one of the joys of the daylily is that every part of the plant is edible at least part of the year.

Unopened flower buds can be cooked in butter and sprinkled with salt. Their flavor is rich and unique; it’s similar, though not identical, to that of green beans. Onions and herbs, such as tarragon and oregano, can be added for flavor. Daylily flower buds take about five minutes to sauté.

The opened flowers are mostly bland and were traditionally used to thicken soup and other dishes. They can also add color to a variety of dishes, including casseroles and salads.

The bulbous portion of the roots have a consistency similar to that of potatoes, but with a sweeter flavor. They can be eaten raw or cooked like potatoes. Remember to never eat a tuber that is soft—eat only firm tubers. Soft tubers are most likely rotten.

More info on this plant and 25+ other plants are available in this book:

thelazygardener

First Year Fruit Tree Care – 5 easy things to do now

Since spring is here in all of its glory, fruit trees and other plants are are alive and (hopefully) thriving. Fruit trees are fun to grow and are unique in their care requirements. Here are five easy things you can do to help your new fruit trees get off to a great start:

Prune

Fruit trees of all ages require regular pruning. Different types of fruit trees have require different pruning methods. Newly planted fruit trees should be pruned at planting. For smaller trees, about a third of the tree should be removed; for larger trees (in the 4-5′ range), anywhere from a third to a half of the tree should be pruned. This is painful for many new fruit tree growers and I get that. I just mention it here because if you do it, it will help that fruit tree (or trees) grow more vigorously, since it removes the above ground portion of the tree to compensate for any root biomass that was lost during transplanting.

But if you don’t want to do that (or if it’s spring and it’s too late to do it this year), don’t despair! Prune the tree properly (for you particular type of fruit tree) once it’s dormant during next winter and you’ll be good to go. We have some pruning tutorials here.

peachpruning

During the growing season, prune off any branch that appears diseased and prune off anything that is growing below the graft union. Otherwise, leave the tree unpruned while it’s growing.

IMG_9477
Suckers coming from the rootstock that need to be pruned off.


Mulch

Every newly planted fruit tree needs mulch around it. Mulch helps hold in moisture and helps prevent weeds from competing with young fruit trees. Ideal mulches include compost, hay or straw, pine straw (if your soil isn’t too acidic), dried grass clippings, or shredded leaves. Other products such as pecan hulls or composted shredded bark will also work. Apply a 3-4” thick layer of mulch extending a least a foot around a newly planted tree, keeping the material just barely away from the graft union. Apply a new layer of mulch on the old one at least once a year or whenever weeds start to grow through the mulch layer.

mulch-1106216_1920
Composted wood chips

Fertilize (or don’t)

Newly planted fruit trees are shallow-rooted, which means that are susceptible to fertilizer-caused root burning. In many soils, a layer of mulch that includes composted manure is a sufficient first year fertilizer. If the trees begin to show yellowing leaves or slower growth, new fruit trees can be fertilized lightly with a high phosphorus fertilizer (0-25-0 for example). The fertilizer should not come directly into contact with plant roots; it should filter through the soil. Certain water-soluble fertilizers are fine to use, since they filter through the soil. Just mix the fertilizer so that it is at 50% or 75% strength.

Organic fertilizers, since they are released slowly over time, are ideal for new fruit trees. Just make sure that the fertilizer doesn’t come into contact with the tree roots. Fertilizer spikes, made to be placed in the ground near the roots of a tree, should not be used on new fruit tree plantings.

Spray (if needed)

There’s an old proverb that says “The best fertilizer is the gardener’s shadow”; this is also the best method of pest control for fruit trees. Daily or at least weekly inspection of your trees during the growing season will help you stay on top of any insect or disease issues that arise. And they will arise, especially in the heat of the summer, or during a drought when everything is drying up except your trees and garden. Insecticidal soap is a good all-around organic choice that will help control many insect pests. There are numerous organic sprays that are effect in controlling fruit tree diseases. New fruit trees planted in an area for the first time often have minimal disease issues during their first season of growth. If diseases do appear, organic and conventional fungicides are available at most big box DIY retailers. Mother Earth News describes a very unique fruit disease spray (that we’ve honestly never tried) made with human urine… (http://www.motherearthnews.com/organic-gardening/garden-safe-fungicide-zmaz83mazraw)

All fruit trees issues are much more easily controlled if caught early.

Water

Because fruit trees are becoming established in the soil over their first year, watering is critical for fruit tree survival during the first growing season. Without roots down deep in the soil, the fruit tree is at the mercy of the soil moisture in the top few inches of soil. These top few inches are always first to go dry during a dry spell. Fruit trees can be watered using many different methods, including drip irrigation or just a regular water hose held over the roots until they’re saturated. Fruit tree water needs vary with air temperature, humidity, and soil type. If the trees receive at least 1 inch of water per week during the growing season, then they will generally do fine. The soil must be well-drained, however, since fruit trees will quickly develop root diseases in saturated soil. Fruit trees have best fruit production when they are not stressed by dry soil or overly saturated soil. Finding the right balance is tricky, but this website from the University of California (http://homeorchard.ucanr.edu/The_Big_Picture/Irrigation/).water-815475_1920

The easiest way to maintain the proper soil moisture for a fruit tree is the plant it in well-drained soil and then to water it deeply twice a week during any dry spells in the summer. Once the trees are several years old, they will have deeper roots that can access water deeper in the soil.

Lazy Gardener Book Excerpt: Society Garlic

Chapter excerpt from The Lazy Gardener’s Guide to Easy Edibles: 25+ Edible Plants Anyone Can Grow

thelazygardener

Society Garlic

main-chapter-pic

Society garlic (Tulbaghia violacea) is a perennial herb or landscape plant that is grown for its fragrant flowers, edible leaves, and edible roots. It is native to Southern Africa and is naturalized in various parts of East Africa and Central America. A part of the onion family, society garlic gets its name from the belief that, while the plant smells like garlic, it supposedly does not cause halitosis the way true garlic does.

Society garlic is an attractive landscape plant with green leaves growing to about 18” in height during the growing season and flower stalks that bloom from summer to fall. The flowers are attractive and can be pink, purple, or blue; they’re also loved by insects. They have a sweet smell and look distinctly different from flowers of other closely related plants, such as onions and true garlic.

Society garlic is easy to grow, especially in climates similar to the southern half of the United States. In more northern climates, it has to be protected from severe winter cold. It is often grown as a container plant in these regions and brought to a protected area during the winter. It will go dormant after a frost anywhere it’s grown, but as long as the ground doesn’t freeze above the first inch or two, the leaves will grow back from the storage roots in the spring. It is very easy to grow and does well in the landscape or herb garden. Some cultivars of society garlic, such as ‘Tricolor,’ have colorful leaves.

Society garlic may help repel some pests from other garden plants. The flowers have a sweet scent at night that attracts moths, which in turn help in the plant’s pollination. Society garlic has received the British Royal Horticultural Society’s Award of Garden Merit.

How to Plant

Plant society garlic bulbs (storage roots) in full sun after the danger of frost has passed. Plant in well-drained soil with organic matter. The plant benefits from a layer of mulch around it and will spread by bulb division over time.

Care

Once established, society garlic is tolerant of dry spells. During the most extreme dry spells, it will go dormant and sprout again after a rain. In the right conditions, the plant will grow quickly, spreading by bulb division into a large clump. It is generally not considered invasive, however, because it forms a clump of plants and doesn’t grow far outside the area where it was planted.

If the clumps grow too large, the plant can be easily divided while it’s dormant. Society garlic is so easy that it can also be divided while it’s still growing, though this may cause the loss of some bulbs. Cut off the leaves at planting if the plant is divided during the growing season.

There are no pest or diseases that seriously harm society garlic, and it does not need any supplemental fertilizer.

In more northern latitudes where the ground freezes, society garlic can be grown in a container in the ground in the landscape and carried to a protected location before a hard freeze. It can also be grown as an annual in cold winter areas. In the United States, it generally freezes out in areas north of USDA zone 7.

Container Growing

Society garlic is an easy plant to grow in containers virtually anywhere. Grow society garlic in well-drained soil in a container with good drainage. For maximum growth, keep the soil in the container moist. If given at least six hours of sunlight per day, society garlic can be grown indoors. It does, however, have a strong garlic smell, so the potential locations for growing it indoors may be limited.

Propagation

Society garlic is easy to propagate by division in winter in warmer areas or in spring in cooler areas. Simply dig up the plant and divide the bulbs into either smaller clumps or individual bulbs. The propagated plants grow into their own clumps of society garlic in a short time. The plant can even be divided during the growing season, though that will result in the death of at least some of the bulbs.

Society garlic can also be propagated by seeds collected after the flowers dry out on the plants. Seed propagation is a bit more challenging, however, than bulb propagation. The easiest way to propagate society garlic by seed is just to plant the seed in the ground. In colder areas, the seeds should be planted the following spring. Keep the seeds moist and cover them with no more than 1/4” of fine soil.

Harvesting

Society garlic leaves can be harvested throughout the growing season and even in winter in warmer areas. Clip the leaves with scissors, taking however much will be needed for an upcoming meal and or for drying. The flowers can be harvested once they bloom; both the flowers and stalk are edible. The roots can be harvested year-round by digging, usually on the outer edges of the society garlic clump. The roots will look like small bulbs.

Enjoying the Harvest

Society garlic leaves can be added to recipes and used like garlic chives, though they tend to have a slightly stronger garlic flavor. The leaves can be easily air-dried and used to season food. The flowers have a sweet, slightly onion-like flavor and can be used to add colorful seasoning to soups and other dishes. The bulbs have a flavor similar to garlic and can be used for flavoring dishes just like garlic would be used. The bulbous roots can be used fresh year-round.

In praise of astringent persimmons: 5 reasons you should grow them

In praise of astringent persimmons: 5 reasons you should grow them

The native American person (Diospyros virginia) is a common tree across much of the eastern half of the U.S. The tree is easy to grow and the small fruits of the American persimmon are edible and palatable when soft, which normally occurs after the first good freeze. But have you ever tried to eat (or been offered by a cruel prankster) a slice of firm American persimmon? It’s a brutal experience, with face contortions as your mouth suddenly feels like its been stuffed with dry cotton balls.

But…don’t discount astringent persimmons just yet. While the American persimmon is astringent, many varieties of cultivated Japanese persimmons are also astringent. What gives? Why would someone want to grow a fruit like that?

The answer is that the fruit of the American persimmon or most varieties of Japanese persimmon (Diospyros kaki) are perfectly pleasant to eat if the fruit is handled properly. As long as the fruit of these persimmons is soft and fully ripe, the persimmons are as useful as any other fruit. With a little patience, the gardener can enjoy one of the easiest-to-grow fruit trees available.

So here are 5 reasons to grow persimmons (including and especially astringent ones):

They’re easy to grow. This is kind of a broad statement, but it’s true. For gardeners in the southern half of the US (and many part of California) and similar climates around the world, persimmons are fuss-free trees that demand little and yet produces plenty. They generally need minimal chill hours (usually under 400) and they bloom late, which means they usually avoid late spring frosts. And best of all, pollination from other varieties usually isn’t necessary in the South, due to the climate and how it impacts persimmon tree sexuality (that part should probably be listed as NSFW…)

They live a long time. The average number of productive years in an average modern peach tree is around 10-15 years. After this time, production tends to decline for peaches. This isn’t the case with persimmons. A persimmon tree will begin producing fruit at 3 years of age, and will begin heavy yields at about 6 years of age and continue production for 40+ years and probably longer.

They have few pests. In the US, persimmons are an easy fruit tree to grow organically because they have few insect pests or disease issues. And if insects or disease do happen to show up, such problems are easily controlled with organic sprays.

They aren’t picky on soil type. Most Japanese persimmons in the US are grafted on American persimmon rootstock. This means that Japanese persimmons will generally grow in any soil where American persimmon is comfortable. I’ve seen American persimmon growing in heavy soil and in sand. The root stock also has a wide tolerance for soil pH levels.

The fruit taste great! Even the astringent varieties, if ripened fully, taste great and can be dried, candied, or made into fruit leather and jelly. The only trick to getting astringent persimmons to become edible is to let them get soft. This can be accomplished by picking the fruit from the tree after the first freeze and placing it in a window for it to get soft. Persimmons will keep on a tree outdoors well into the winter – they can be picked and enjoyed as needed.

Some great astringent persimmons are:

Eureka – Developed in Texas and one of the best for the Gulf Coast, including down into Florida; drought and frost resistant; consistently self-pollinating.

Tani Nashi – An old favorite; beloved in Japan for drying; seedless and self-pollinating

Hachiya – Another favorite for drying; almost seedless; needs another astringent persimmon for pollination.

Tamopan – A uniquely shaped persimmon that came to the US from China over 100 years ago; a consistent bearer; fruit is astringent until fully ripe, when it becomes really sweet; seedless and self-pollinating.

A fast guide to planting onions fast

A fast guide to planting onions fast

It’s onion planting season in much of the southern United States, so I thought I would offer a guide to how to quickly obtain and plant onion plants for gardeners in the South (and other places when the season is right). So here we go with a quick list:

Get the onion plants. Onion plants can be purchased from us or from other places. Onion plants are grown from seed and harvested when immature to be bunched and shipped to nurseries, feed stores, and customers across the U.S. We’ve got them and we are shipping them to people within 24 hours of ordering. About 90% of the onion plants in the United States come from a single farm in south Texas!

img_8647

Till the ground. Onions need loose, well-tilled soil to produce the largest bulbs. They generally aren’t picky when it comes to soil type as long as the soil is well drained. Remove any rocks or roots that may deform the onions, and make a row of soil above the typical soil line, especially in areas with poorly drained soil (such as clay). Raised bed also work nicely.

img_8649

If there is some question on the soils fertility, till organic matter into the soil. Composted animal manure and/or compost is a good choice. Even though it’s usually associated with green leafy growth, onions need lots of nitrogen to make big bulbs. Composted poultry manure in particular is usually  high enough in nitrogen to promote healthy onion bulb growth.

If you’re planning to grow onions using conventional fertilizer, try placing some high phosphate fertilizer 2-3 inches below the soil where the onions will be planted. For best results, use about half a cup of high phosphate fertilizer (such as 10-20-10) per 10 feet of row.

Plant the onions! So you’ve got the onions. Unwrap the lovely rubber band from around the plants. Most onion plant bundles have about 60 onions in them. I generally like have a slightly elevated row, with a trench already dug down the middle of it.

img_8650

Some of the onion plants will be smaller than others – these will grow into onions, but they will probably be smaller than some of the others. If that bothers you, then they grow into excellent green onions.

For green onions, plant the onion plants 2-3 inches below the top of the soil. For bulb onions, plant then small bulb of the onion plant just below the soil line, being sure to cover it completely with soil (and with the roots down, obviously).img_8651

For larger onions, plant the transplants 4 inches apart. If you want to enjoy green onions, plant the onions 2 inches apart and pull every other plant over the next month, using the pulled plants as green onions. With either spacing, you can plant a bundle of 60 onions in prepared ground in just a few minutes.

img_8652

Wait and fertilize! Onions needs nitrogen so they should be “side-dressed” with a cup of high nitrogen fertilizer per 20 feet of row every month while they’re growing. High nitrogen organic fertilizer is also an option, though it will most like take more organic fertilizer to have the same effect on the onions. Composted poultry or dairy manure is usually relatively high in nitrogen.

Onions are easy to grow in containers too….

img_8654

Mulch! Mulch those onions – because nothing is more annoying or tedious than weeding around onions. Pine needles, leaves, and compost are all good options.

Harvest! Onions should be ready for harvest as soon as the tops die back. If the onion plant flowers (“bolts”) then it is still good – just use it first, since it won’t store well.

Store the onions. Onions do best when left to dry out in dry place with plenty of ventilation. More pungent onions keep the best; sweeter onions don’t keep as long. Onions will keep in a dry place in a mesh bag for an extended period of time. It’s also been reported that they will keep in a refrigerator for up to a year if the tops are clipped and the onions are wrapped in foil.

I planted 120 onions the other day with 2 four year olds and an 8 year old helping me and we were done in less than 10 minutes – including the tilling and fertilizer prep. I’ll spend a little extra time adding a mulch of composted forest leaves, and I’ll add some fertilizer, but the hard work is done. And it was done fast! 🙂

Onions and many other easy edible plants are included in The Lazy Gardener’s Guide to Easy Edibles, available on Amazon and, this spring, in bookstores! 🙂